Glass, Smudges and Grey Skies: Rescuing Photos Shot Through Shop Windows
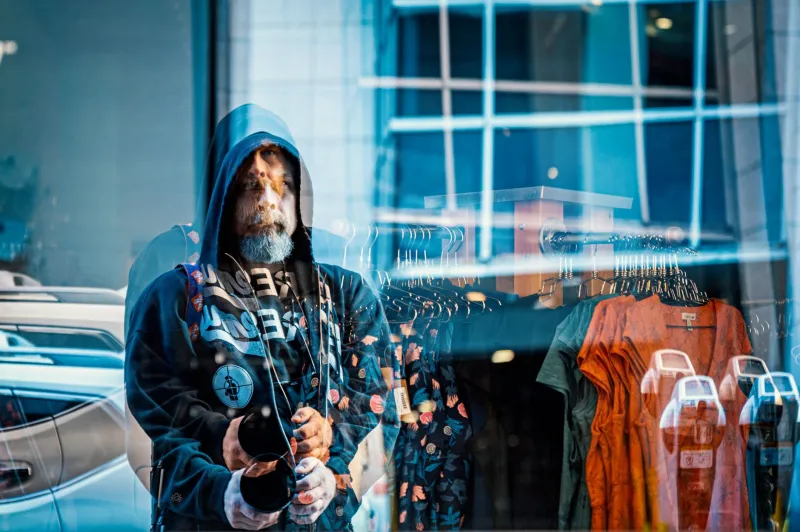
There’s a particular kind of disappointment that comes from reviewing a shopfront shoot on a drizzly Tuesday. You framed the display beautifully, the light was soft enough to flatter the products, and the pavement outside was quiet. Then you open the files and find a grey wash over everything: a milky haze, a ghost of your own reflection, and a faint green tinge that makes the whole scene look like it was photographed through a pint glass.
Glass is the problem, but it’s also the point. If you photograph UK high streets for a living — or just for your own small business — you’ll spend a lot of time shooting through glazed shopfronts, café windows and market-stall covers. The good news is that most of the haze is recoverable. The better news is that a few on-location habits can save you half the edit before you even open the raw file.
On location: stop the haze before it starts
The most effective anti-haze tool is not a slider. It’s a lens hood pressed gently against the glass. This does two jobs: it blocks stray light from hitting the front element, and it physically cuts out a huge chunk of the reflection between you and the window. You don’t need to jam it in — just make contact, keep the camera square to the glass, and frame with a little breathing room. If your lens hood is shallow, a dark jacket draped over the back of the camera and your head works wonders. It looks faintly ridiculous on a quiet Saturday morning, but it works.
A circular polariser is the other obvious defence, but the angle matters. Reflections are strongest when you’re shooting square-on to the glass. Rotate the polariser while watching the reflection, not the scene behind it — you’re looking for the point where the sky and your own silhouette fade. On a shopfront, that sweet spot is often a step to one side rather than dead centre. If the window is thick, laminated, or has a film on it, the polariser will help less. That’s normal. Thick glazing does strange things to light.
Finally, clean the glass if you can. A fingerprint on the inside of a café window will show up as a soft smudge exactly where you wanted the croissant to be. A microfiber cloth and a little water on the outside pane can save a lot of cloning later. Ask first, obviously.
The first rule of the edit: local contrast before global sliders
When you get the file home, the temptation is to drag Dehaze to the right and hope for the best. Don’t start there. Dehaze is a blunt instrument: it lifts contrast and saturation in a way that can make skin tones go orange and white plates go blue. Start with local contrast instead.
In Lightroom or Camera Raw, open the image and add a small amount of Texture before Clarity. Texture targets the mid-frequency detail — the edges of product labels, the weave of a jumper, the crust of a pastry — without flattening the whole scene. Then use a graduated filter or radial mask over the hazy area and add a touch of Clarity inside it. Keep the global Clarity low. The aim is to cut through the milkiness without making the image look crunchy.
If the haze is uniform across the frame, a gentle S-curve in the Tone Curve panel is often more natural than Dehaze. Lift the black point slightly, pull the shadows down a notch, and add a small contrast bump in the midtones. You’re rebuilding the separation that the glass stole. Check the histogram: if you’re clipping the blacks, you’ve gone too far.
Neutralising the green cast of thick glazing
Old shopfront glass — especially the thick, slightly wavy stuff you find in Victorian arcades and market halls — often pushes a green cast. Modern laminated glass can do it too. The give-away is a scene that should be neutral but feels slightly seasick. White paper looks cream with a green edge; grey pavement looks olive.
Don’t fix this with the global White Balance slider alone. Use a Color Mixer adjustment instead. In Lightroom, go to the HSL panel and nudge the Green Hue slightly towards yellow, then reduce Green Saturation by a few points. If the cast is strong, use a Color Range mask over the glass area and apply a Temperature correction there. A tiny shift is usually enough. The goal is to make the whites neutral again without bleaching the actual greenery in the scene — a plant in the window should still look like a plant.
For Photoshop users, a Curves adjustment layer with a subtle green-channel pull in the midtones works well. Mask it to the glazed areas and keep the opacity low. If you’re working on a JPEG from a phone, be even gentler: phone files have less headroom, and heavy colour shifts can introduce banding in smooth areas like painted walls.
When to keep the reflection
Not every reflection is a defect. A faint ghost of the street behind you — a red bus, a passing umbrella, the curve of a Victorian lamp post — can add context and a sense of place. The trick is to decide whether the reflection is competing with the subject or complementing it. If it’s a soft, low-contrast shape in the corner of the frame, leave it. If it’s a hard-edged reflection of your own face right over the display, clone it out.
A useful test: squint at the image. If the reflection disappears when you squint, it’s probably adding texture rather than distraction. If it’s still the first thing you see, it needs work. Use the Clone Stamp or Healing Brush on a separate layer, and sample from nearby glass rather than from the product itself. Take your time. Glass has subtle gradients, and a heavy-handed clone job looks worse than an honest reflection.
A quick sequence for a typical high street shot
Here’s the order I use for most through-glass images:
- Correct the white balance using a neutral area of the glass or a grey card if you shot one.
- Apply a local contrast boost with Texture and a masked Clarity adjustment.
- Neutralise any green cast with HSL or a masked colour correction.
- Gently rebuild contrast with a tone curve, checking for clipped blacks.
- Decide which reflections stay and which go. Clone on a separate layer.
- Sharpen only at the end, and use a mask to avoid sharpening the haze.
The final check is simple: does the image look like a photograph taken through glass, or does it look like a photograph that has been scrubbed to death? The best edits keep a little of the glass character — a faint softness at the edges, a hint of the street outside — while letting the subject breathe. That’s the difference between a rescue and a cover-up.