Smoke, Sparks and Skin Tones: A Fair Edit for Bonfire-Night Photos
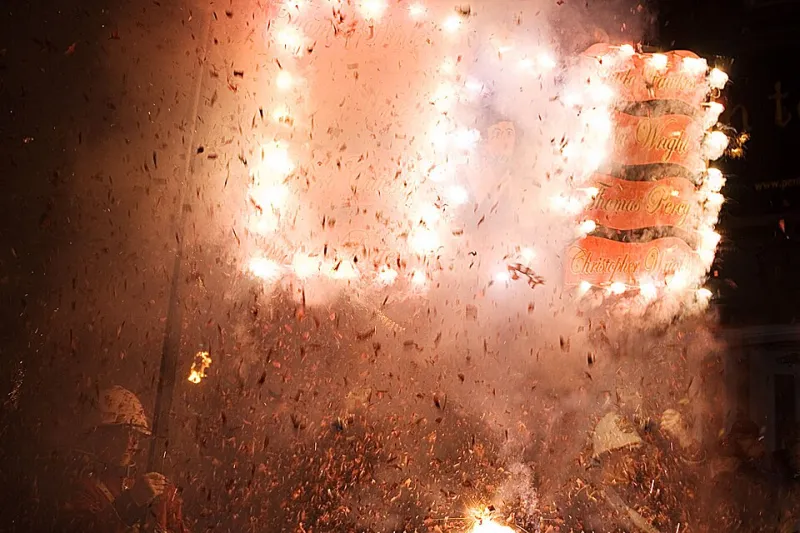
Photo: Unknown, CC BY-SA 2.0, via Wikimedia Commons
Bonfire night is a lovely mess of light. You have the fire itself, the odd burst of fireworks, a floodlight on a marquee, maybe a sodium lamp near the chip van, and enough smoke drifting about to make every photo look like it was taken through a lightly greased window. The result is often the same: faces go orange, whites go yellow, highlights burn out, and the whole scene has a soft haze over it that no amount of contrast seems to fix.
The temptation is to drag the Dehaze slider to the right and hope for the best. That usually gives you a hard, grey, slightly crunchy image where the smoke has vanished but so has the atmosphere. The better approach is to correct in a deliberate order and to treat the smoke as part of the picture, not an enemy to be eliminated.
This workflow works in Lightroom, Camera Raw, and most editors with masks and basic tone controls. Phone editors can follow the same sequence with local adjustments, even if the sliders are named differently.
Start with white balance, but do not neutralise the fire
White balance comes first because every later adjustment builds on it. If you try to fix haze before colour, you will end up chasing the image around the screen.
The key is to aim for believable skin, not neutral grey. A bonfire scene should feel warm. If you use the eyedropper on a grey coat and make it perfectly neutral, the fire will look cold and the faces will look ill. Instead, find something that should be roughly neutral — a white marquee panel, a pale jacket, a concrete path — and use that as a reference, then nudge the temperature back towards warm until the scene feels like the night you remember.
If the light is a mix of fire and floodlight, you will not get a perfect global white balance. Pick the compromise that makes faces look plausible. A little orange in the background is fine. Orange skin is not. For mixed sodium and firelight, watch the tint as well: sodium can push things yellow, while some LED floodlights leave a green edge that becomes obvious once the orange is reduced.
Do this before dehaze. Dehaze shifts colour, and if you apply it first you will be correcting a colour cast that the dehaze helped create.
Dehaze locally, not globally
Smoke is not evenly distributed. It hangs in one corner, drifts across the middle, and leaves the foreground clear. A global Dehaze adjustment punishes the whole image for a problem in one area.
Start with a low global setting — somewhere around +5 to +10 — and see whether that is enough. Often it is not, but it gives you a baseline. Then use a mask over the hazy area and apply Dehaze more strongly there. In Lightroom, a brush or a linear gradient works well; in Camera Raw, use a local adjustment mask and subtract your subjects so the effect does not land on faces or the edges of clothing.
Keep an eye on the edges. Dehaze loves to create halos around heads, trees and marquee poles. If you see a bright outline, reduce the amount or soften the mask. The goal is to recover a bit of depth in the smoke, not to pretend the air was crystal clear.
On a phone, use a local brush or selective adjustment over the smokiest part of the frame. Small amounts, repeated, are better than one heavy pass.
Recover highlights before you add contrast
Fire and floodlights are bright, and bonfire-night photos often have blown highlights in the flames, the fireworks and any white clothing near the light source. Pull those back early.
Use the Highlights slider first, then Whites if needed. A reduction of around -30 to -60 on Highlights is a reasonable starting point, depending on how much detail is left. Do not expect miracles: if a highlight is pure white, there is no detail to recover. The aim is to stop the brightest areas from pulling attention away from faces.
After highlight recovery, check the shadows. People standing away from the fire can go very dark under hats and hoods. Lift Shadows gently, but do not overdo it or the smoke will turn into a noisy grey soup. If one face is still too dark, use a local mask and raise exposure just on the face rather than lifting the whole image.
This order matters. If you add contrast before recovering highlights, you can make clipping worse and create halos around bright edges.
Tame the orange cast without bleaching the scene
Once the tonal base is sensible, look at colour. The orange cast usually sits in the reds and oranges, and it shows up most on skin. A small reduction in orange saturation — think -5 to -15 — can make faces look human again without killing the fire.
You can also raise orange luminance slightly if faces look muddy, but be careful: too much and skin goes flat and grey. For mixed light, use a colour mask or skin-tone selection so you are adjusting faces rather than every warm tone in the frame. The fire, sparks and fairy lights should stay rich.
If the smoke has taken on a dirty yellow tone, a tiny hue shift in the yellows or a small saturation reduction can help. Keep it subtle. Bonfire night is supposed to look warm, smoky and a bit chaotic. The edit should feel like a cleaner version of the night, not a different event.
Apply noise reduction last and keep it gentle
High-ISO noise is common at these events, especially when you are pushing shadows or using a phone in the dark. Apply luminance noise reduction after the tonal and colour work, because lifting shadows will amplify noise and change how much reduction you need.
A modest luminance setting — around 20 to 35 — is usually enough for a screen-sized image. Colour noise reduction can go a little higher, perhaps 15 to 25, to clean up the speckled patches in the smoke. Avoid the temptation to smooth everything into plastic. A little grain in the smoke is fine; it reads as atmosphere.
If your editor has AI denoise, use it cautiously and compare at normal viewing size, not at 200%. Over-denoised bonfire photos look oddly sterile, especially when the smoke is meant to be soft.
A repeatable recipe for the whole set
For a batch of community bonfire photos, work in this order:
- Set white balance for believable skin, keeping some warmth.
- Apply low global Dehaze, then add local Dehaze over the smokiest areas.
- Recover highlights, then lift shadows only where needed.
- Reduce orange saturation slightly and adjust skin luminance with a local mask.
- Apply gentle luminance and colour noise reduction.
- Sharpen with masking so the smoke and sky stay soft.
Once you have a look you like, sync the basic settings to similar frames and then adjust the local masks. Not every photo needs the same treatment, but the sequence keeps you consistent.
Know when to stop
The sign of a good bonfire edit is that you can still see the smoke. If the air looks like a clear summer evening, you have gone too far. If every face is grey, you have gone too far the other way. The sweet spot is a scene that feels warm, readable and honest — faces you recognise, fire that still glows, and smoke that behaves itself just enough to let the picture breathe.