Puddles With Manners: Editing Wet UK High Streets Without the Gloss
Wet pavements are generous. They double the Christmas lights, stretch the shop signs across the setts and give a tired town centre a bit of drama for free. The trouble starts when we try to help. One nudge of saturation, one heroic clarity slider, and a damp Tuesday in Leeds starts looking like a laminated postcard from a gift shop that closed in 2009.
The aim here is not to make the rain disappear, or to pretend the high street is prettier than it is. It’s to keep the scene clear: readable stone, believable colour, highlights that glint rather than smudge. That means getting a few things right in camera, then editing with a light hand and a suspicious eye.
Shoot for the stone, not the signs
Mixed light is the first trap. A wet high street after dark is usually a pile-up of warm shop windows, cold LED street lamps, a festive projection doing something purple to the Methodist church, and maybe a taxi braking at the lights. If you expose for the brightest sign, the pavement goes to soup. If you expose for the pavement, the signs turn into white rectangles.
On a phone, tap on a patch of wet stone that isn’t directly under a lamp and slide the exposure down until the highlights on the shopfronts are just holding on. On a camera, use the highlight warnings and let the deepest shadows sit low — wet streets are allowed to have dark corners. You are not trying to make a flat, evenly lit record. You want the stone to keep its texture and the reflections to stay as reflections, not become the subject of a rescue operation.
A small practical note: a lens cloth is part of the exposure toolkit. A smear on the front element will bloom every highlight in the frame, and no amount of dehaze will put that right.
Let the specular highlights live
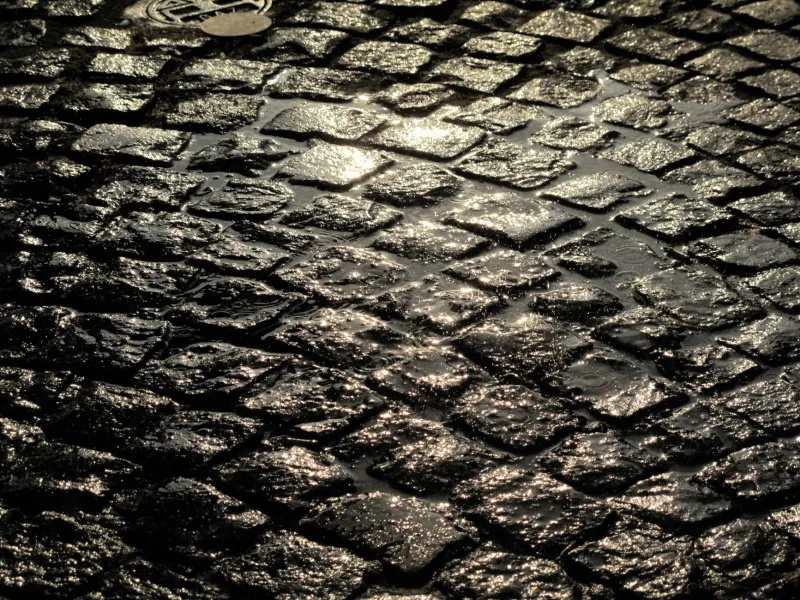
Wet stone is mostly specular highlight — tiny, hard reflections off grit and gritstone. The instinct is to pull Highlights down hard and call it recovery. Do that and the pavement goes grey and matte, like a dried-out riverbed. The scene loses the thing that made it wet.
Instead, pull Highlights down just enough to keep detail in the bright shop windows, then use a local adjustment — a brush or a linear mask — on the pavement only. Bring the brightest puddle reflections down a touch, and lift the mid-tones in the stone around them. That keeps the sparkle but stops it shouting. If you are working on a phone, the same job can be done with a selective adjustment or a gentle vignette that darkens the edges of the frame rather than the puddles themselves.
Avoid heavy dehaze on wet streets. It is designed for atmospheric haze, not for rain-slicked surfaces, and it tends to turn reflections into a metallic sheen that looks nothing like wet British paving.
Sort the colour cast before you touch saturation
LED lighting is the usual culprit. Shop signs and modern street lamps can push a green or magenta cast across wet stone, and festive displays add their own colour — often several at once. The mistake is to fix this by warming the whole image until the pavement looks like honey. That sorts the shopfront and ruins the sky.
Find something neutral in the frame: a white painted windowsill, a grey stone kerb, a piece of A-boards with white lettering. Use that as your white-balance reference, either in camera or in the raw editor. If there is nothing neutral, set the white balance by eye until the stone looks like stone and the whites in the scene are not tinted. Then, if one shop sign is still doing something odd, use a local colour adjustment rather than a global one.
On phones, resist the auto white balance if it keeps drifting between frames. Lock it by tapping and holding on a neutral patch. Consistency across a set of photos matters more than absolute colour accuracy on any single frame.
Local contrast: enough to read, not enough to rattle
Wet pavements need local contrast to show texture, but the wrong kind makes everything look like a video game. Clarity and texture sliders are useful in small doses — think of them as a way to help the stone read, not as a personality. If the pavement starts looking crunchy, back off.
A better move is to dodge and burn gently. Lift the mid-tones on the dry patches of pavement and the lower walls, then darken the reflections and the deep shadows between setts. That gives the street depth without the HDR halo. On a phone, use the brush tool at low opacity and build it up slowly; on a computer, a luminosity mask for mid-tones will do most of the work.
Keep an eye on the edges of the frame. Wet streets often have a bright shop window at one side and a dark alley at the other. If you have pulled the shadows up globally, the alley will look grey and flat. A gentle vignette — very gentle — can bring the eye back to the wet stone in the middle without pretending the alley isn’t there.
A short working order
- Set white balance from something neutral, or lock it on the phone.
- Pull Highlights down until the shop windows hold detail, but no further.
- Lift shadows a little, then use local adjustments on the pavement rather than the whole frame.
- Add a small amount of texture or clarity to the stone, checking at 100% for crunch.
- Fix any remaining colour cast locally, not globally.
- Compare the edited frame with the original at fit-to-screen size. If the edit is doing all the talking, dial it back.
The test is simple: does it still look like a British high street on a wet evening, or does it look like a stock photo called “Christmas Shopping”? You want the first one. Wet cobbles are already a good story — the edit only needs to keep them legible.